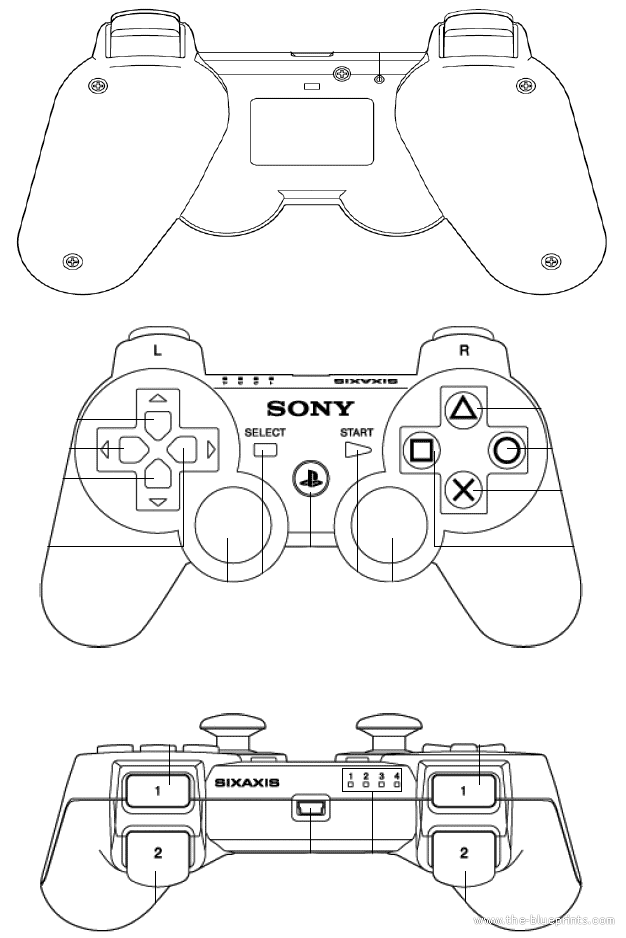
Drive the vehicle with the PlayStation 3 Controller
Although the procedure in this chapter is written for the Wilson project, it is actually a generic way for integrating the PlayStation 3 Controller with a Raspberry.
After this setup you will be able to steer the Wilson’s vehicle using any of the 3 joysticks on the PS3 controller: left, right, or gyroscopic joystick (by tilting the controller).
Before getting into the code, we need first to perform some settings and install a few software components.
You need to:
• Tell the controller that the Raspberry is the new master
• Connect the PS3 Controller to the Raspberry via Bluetooth
• Install the PS3 Controller driver (sixad)
• Download and compile the joystick C++ app
Set the Raspberry as the master
You have been using your DualShock controller with your PlayStation console so when the controller is switched on it looks for the device it was told to connect to, that is the PS console. It is because the controller registered the MAC address of the console when it was first configured to work with the PlayStation. You now need to change this setting and replace that MAC address by the one of the Raspberry. The sixpair tool will do this.
Sixpar is not available using the package manager so you need to download and build it.
Create a directory and download the code
pi@wilson:~ $wget http://www.pabr.org/sixlinux/sixpair.c
You may get an error like this due to missing dependencies
pi@wilson:~ $gcc -o sixpair sixpair.c -lusb sixpair.c:23:10: fatal error: usb.h: No such file or directory #include <usb.h> ^~~~~~~ compilation terminated.
If this happens, install the USB lib ...
pi@wilson:~ $sudo apt-get install libusb-dev
... and try to compile again. This time it should work.
Move the program sixpair to ~/bin.
With sixpair now compiled, plug the PS3 Controller to the Raspberry using the USB mini cable and execute sixpair
pi@wilson:~ $sudo /home/pi/bin/sixpairCurrent Bluetooth master: b8:27:eb:ce:2b:38Setting master bd_addr to b8:27:eb:ce:2b:38
By running hciconfig you can verify that the master bd address reported by sixpair is the one of your Raspberry
pi@wilson:~ $hciconfig hci0: Type: Primary Bus: UART BD Address: B8:27:EB:CE:2B:38 ACL MTU: 1021:8 SCO MTU: 64:1 UP RUNNING PSCAN RX bytes:95174 acl:711 sco:0 events:2849 errors:0 TX bytes:26565 acl:982 sco:0 commands:712 errors:0
This is a one-time operation and you will not need to perform this setup again. Uninstall sixpair if you want to.
Connect via Bluetooth
Follow these steps to pair the controller to the Raspberry via Bluetooth.
1. Run bluetoothctl
pi@wilson:~ $sudo bluetoothctlAgent registered[bluetooth]#
2. Enable the agent and set it as default, power it on, and set it as discoverable and pairable
[bluetooth]# agent onAgent is already registered [bluetooth]# default-agentDefault agent request successful [bluetooth]# power on [bluetooth]# discoverable onChanging discoverable on succeeded [bluetooth]# pairable onChanging pairable on succeeded
3. Connect the controller to the system using a USB cable and press the PlayStation button
[CHG] Device 00:06:F7:41:75:2E UUIDs: 00001124-0000-1000-8000-00805f9b34fb[CHG] Device 00:06:F7:41:75:2E UUIDs: 00001200-0000-1000-8000-00805f9b34fb
The traces show that the Bluetooth MAC address of the PS3 Controller is 00:06:F7:41:75:2E.
4. Allow the service authorization request
[agent] Authorize service service_uuid (yes/no): yes
5. Discover the controller's MAC address
[bluetooth]# devicesDevice 00:06:F7:41:75:2E Sony PLAYSTATION(R)3 Controller
Note that is the same in the traces before.
6. Trust the controller
[bluetooth]# trust 00:06:F7:41:75:2EChanging 00:06:F7:41:75:2E trust succeeded. push the central PS button.
7. Disconnect the USB cable
8. Quit bluetoothctl
[bluetooth]# quit
The PS3 Controller is now paired.
Install the driver
QtSixA is the Sixaxis Joystick Manager used to connect a PS3 Controller to a Linux machine. QtSixA is the GUI (interface), while sixad is the backend C++ code. Out of the QtSixA package we take just the C++ interface.
Follow this intallation procedure:
1. Download QtSixA
pi@wilson:~ $wget http://sourceforge.net/projects/qtsixa/files/QtSixA%201.5.1/QtSixA-1.5.1-src.tar.gz
2. Decompress the tar file
pi@wilson:~ $tar xfvz QtSixA-1.5.1-src.tar.gz
The source code requires a patch to compile correctly, then:3. Download the patch ...
pi@wilson:~ $wget https://bugs.launchpad.net/qtsixa/+bug/1036744/+attachment/3260906/+files/compilation_sid.patch
... and apply it
pi@wilson:~ $patch ~/QtSixA-1.5.1/sixad/shared.h < compilation_sid.patch
4. It should now correctly build and install
pi@wilson:~ $cd QtSixA-1.5.1/sixad
pi@wilson:~ $make
pi@wilson:~ $sudo mkdir -p /var/lib/sixad/profiles
pi@wilson:~ $sudo checkinstall
Now sixad is ready.
5. Run sixad as command line ...
pi@wilson:~ $sudo sixad --startsixad-bin[507]: startedsixad-bin[507]: sixad started, press the PS button now
6. ... and press the PS button. You will notice the controller rumbling while these messages appear
sixad-sixaxis[511]: startedsixad-sixaxis[511]: Connected 'PLAYSTATION(R)3 Controller (00:06:F7:41:75:2E)' [Battery 02]
Joystick device
The result of running sixad and connecting the controller as indicated before is that 2 new devices are created: /dev/input/event0 and /dev/input/js0
pi@wilson:~ $ls -al /dev/input total 0 drwxr-xr-x 2 root root 100 Jul 12 17:01 . drwxr-xr-x 15 root root 3540 Jul 12 13:34 .. crw-rw---- 1 root input 13, 64 Jul 12 17:01 event0 crw-rw---- 1 root input 13, 0 Jul 12 17:01 js0 crw-rw---- 1 root input 13, 63 Jul 12 06:17 mice
From this moment on, the PS3 Controller can be managed as a linux device and apply some of the system tool. For example, to verify that the system sees the controller as a joystick, try:
pi@wilson:~ $cat /proc/bus/input/devices I: Bus=0006 Vendor=054c Product=0268 Version=0100 N: Name="PLAYSTATION(R)3 Controller (00:06:F7:41:75:2E)" P: Phys= S: Sysfs=/devices/virtual/input/input1 U: Uniq= H: Handlers=js0 event0 B: PROP=0 B: EV=20000b B: KEY=1ffff 0 0 0 0 0 0 0 0 0 B: ABS=7f fc00ffff B: FF=7030000 0 0
Test the responsiveness with jtest tool or use fftest to command effects on the controller:
pi@wilson:~ $fftest Force feedback test program. HOLD FIRMLY YOUR WHEEL OR JOYSTICK TO PREVENT DAMAGES Device /dev/input/event0 opened Features: * Absolute axes: X, Y, Z, RX, RY, RZ, Throttle, Rudder, Wheel, Gas, Brake, Tilt X, Tilt Y, Tool width, Volume, [FF FF 00 FC 7F 00 00 00 ] * Relative axes: [00 00 ] * Force feedback effects types: Periodic, Rumble, Force feedback periodic effects: Square, Triangle, Sine, [00 00 00 00 00 00 00 00 00 00 03 07 00 00 00 00 ] * Number of simultaneous effects: 16 Uploading effect #0 (Periodic sinusoidal) ... OK (id 0) Uploading effect #1 (Constant) ... Error: Invalid argument Uploading effect #2 (Spring) ... Error: Invalid argument Uploading effect #3 (Damper) ... Error: Invalid argument Uploading effect #4 (Strong rumble, with heavy motor) ... OK (id 1) Uploading effect #5 (Weak rumble, with light motor) ... OK (id 2) Enter effect number, -1 to exit
Try one of the available effect by typing, e.g., 4 and check the controller vibrates.
C++ code
The Wilson project provides the C++ code to capture events from js0, translate those events into (x, y) coordinates, and communicate through linux sockets with the Wilson process that generates the PWM signals to power the motors. This code is also able to trigger rumble effects into the controller.
To install this SW proceed as follows:
1. Download the tarball with the source code
pi@wilson:~ $wget http://www.iambobot.com/downloads/wilson_ps3.tar.gz -O ~/downloads/wilson_ps3.tar.gz
2. Decompress the file you just downloaded
pi@wilson:~ $tar -C / -xvf ~/downloads/wilson_ps3.tar.gz
3. Compile the code
pi@wilson:~ $winstall
To run the sw:
1. Start sixad
pi@wilson:~ $sudo sixad –start
2. Switch on the Controller by pressing the PS button
3. Once connected execute the SW selecting the axis: 0 for left joystick, 1 for (default) right joystick, or 2 for gyroscope.
pi@wilson:~ $ps3 -a 1
You need the wilson program to be running. Now press the triangle button to "release the breaks" (note the front light turns on) and play with the joystick to drive the vehicle.


